
Follow the steps below to add photos to your inventory:
Login to the backend of your website (i.e. yourdomainname/portal)
- Click the Manage Inventory selection in the menu
- Click the vehicle you want to add photos to. It will open the Update Inventory page.
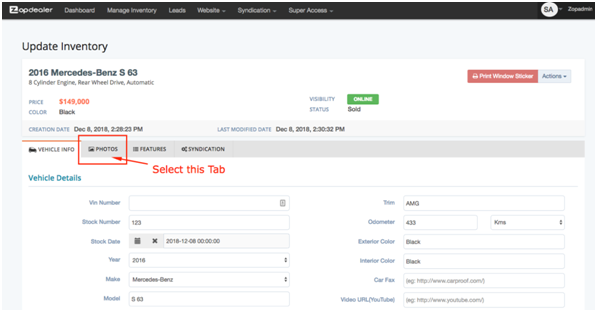
- Select the Photos tab.
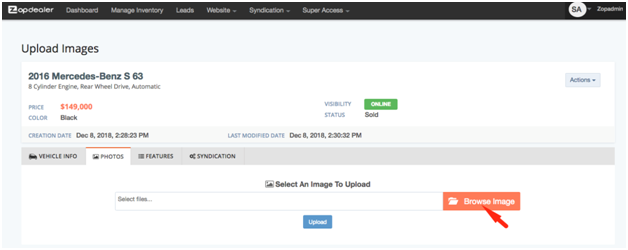
4. Select the Browse Image button.
5. Navigate to the image(s) on your computer to upload. You may select more than one by holding down CTRL on your keyboard as you select the images. Once all images are selected, click on Open for them to added.
6. Click the blue Upload button located at the bottom of the page to upload all the selected images.
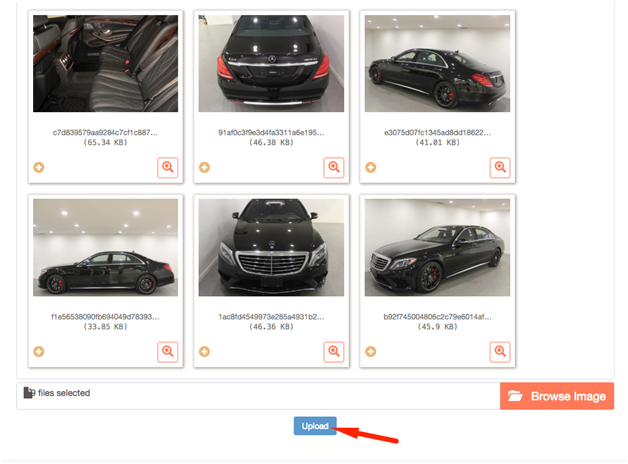 7. If you wish to add more images, select Browse Image and select the others. Once done, select Upload.
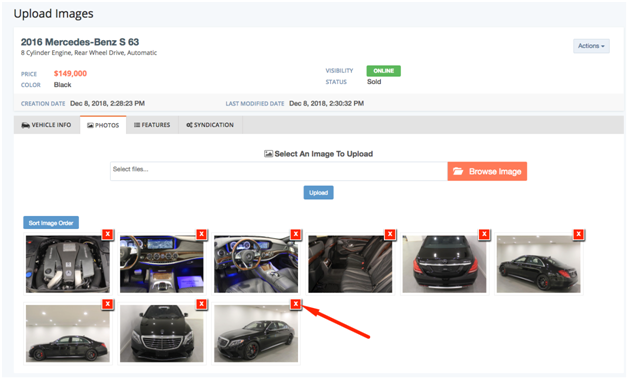
8. All images uploaded will display at the bottom. The first image is the vehicle image displayed on the Inventory Listing and Vehicle Detail pages. If you wish to select a different picture or recorder the images, select the Sort Image Order button. This will allow you to drag and reorder the sequence of the pictures. Once you are done sorting the order, select the blue Save Reordering button.
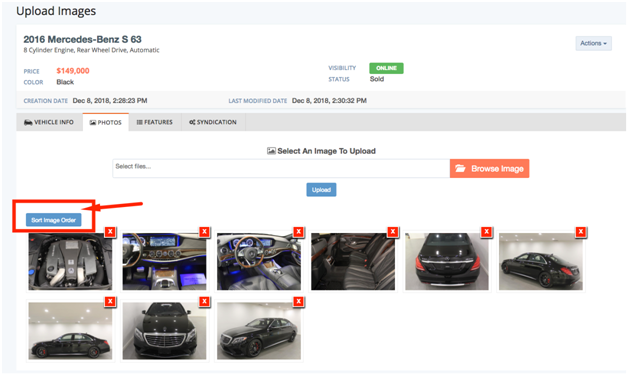
9. Selecting the X the top right corner of the photo will remove/delete the image.
A few additional notes related to uploading vehicle photos:
- There is no restriction of the number of images you may upload, however, our recommendation is to upload at maximum 20 at a time with normal resolution.
- If using high-resolution images, upload 3 at a time.
- Always use a unique name for images. If an image name is recycled, please clear cache on your computer to view the update on your website.