
Add a Vehicle
Follow the steps below to add a vehicle to your inventory manager
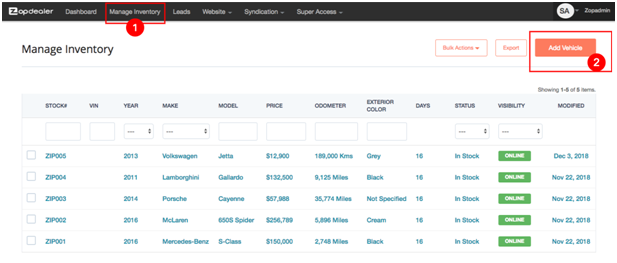
Login to the backend of your website (i.e. yourdomainname/portal)
1. Click the Manage Inventory selection in the menu
2. Click the Add Vehicle button on the top right
STEP 1 OF 4: Vehicle Info
Vehicle Info
1. Enter vehicle details. This is done in a two-step process. First you enter the main vehicle details and then you can add information including photos, features and select for syndication.
a. Required fields that are left blank will be outlined in red. These are required to save the record.
b. VIN: Enter the VIN number and hit Decode. It will decode all of the vehicle’s details available from the manufacturer.
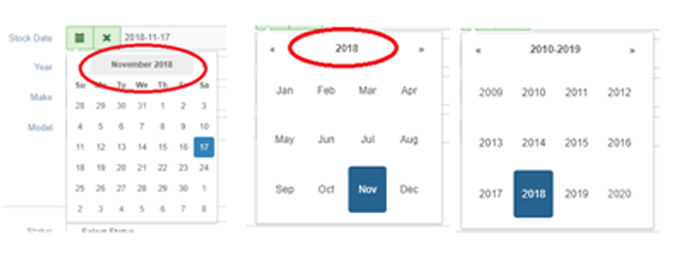
c. Stock date: date must be selected from the calendar; it cannot be typed in. To jump to another date, click on the MMM, YYYY header (ex. November2018) and it will zoom out to all the months. Click it again, and it will zoom out to years.
d. Carfax: if you have a Carfax URL, enter it here. Doing so will result in the logo displayed on the Vehicle Listing Page and Vehicle Detail Page.
e. Status: In Stock or Sold. If Sold is selected and the vehicle has Visibility: Online, you will see the image with a ‘Sold’ stamp on it.

f. Featured Vehicle: If you have a ‘Featured Vehicle’ page / section on your website, all vehicles set as Yes will be listed as part of the ‘Featured Vehicles’.
g. Visibility: determines if the vehicle is visible Online or Offline the website.
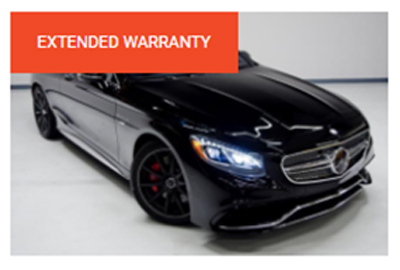
h. Vehicle Tag: the selected option is displayed on the picture. If no tag is required, select None.
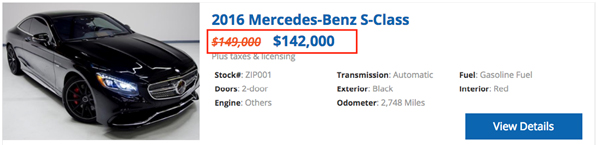
i. Special Price: This is not a required field but you can enter a reduced price that will display along with a crossed out original price.
j. Vehicle Description: is displayed when viewing the ‘Vehicle Details’ page.
k. Disclosure: is displayed at the very bottom of the ‘Vehicle Details’ page. Any vehicle disclosures can be entered here.
l. Hit Save at the bottom left to save the record.
STEP 2 OF 4: Photos
Photos
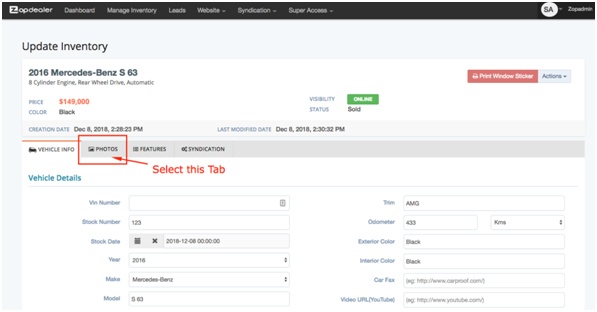
1. Once step one is saved above, you will then have the option to add photos. Select the Photos tab.
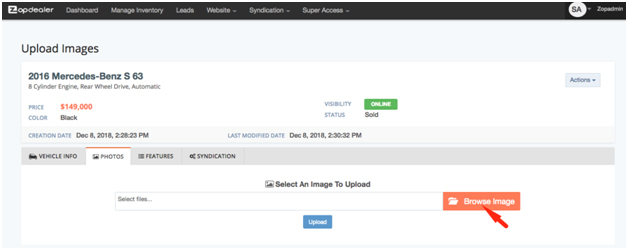
a. Select the Browse Image button.
b. Navigate to the image(s) on your computer to upload. You may select more than one by holding down CTRL on your keyboard as you select the images. Once all images are selected, click on Open for them to added.
c. Click the blue Upload button located at the bottom of the page to upload all the selected images.
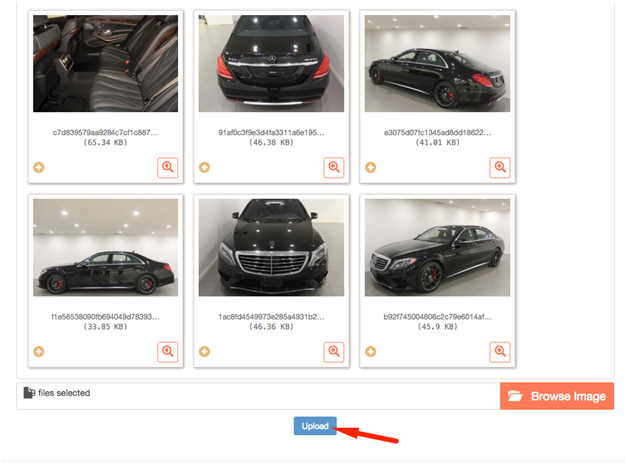
d. If you wish to add more images, select Browse Image and select the others. Once done, select Upload.
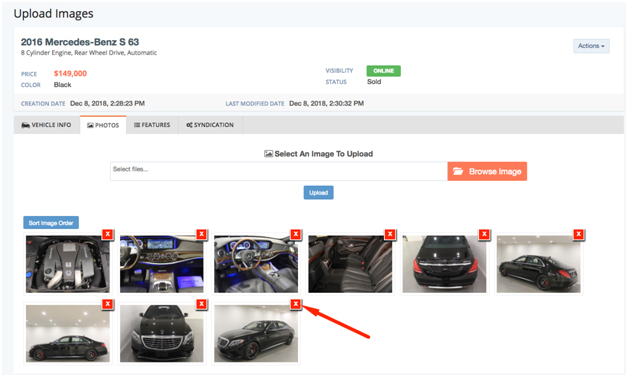
e. All images uploaded will display at the bottom. The first image is the vehicle image displayed on the Inventory Listing and Vehicle Detail pages. If you wish to select a different picture or recorder the images, select the Sort Image Order button. This will allow you to drag and reorder the sequence of the pictures. Once you are done sorting the order, select the blue Save Reordering button.
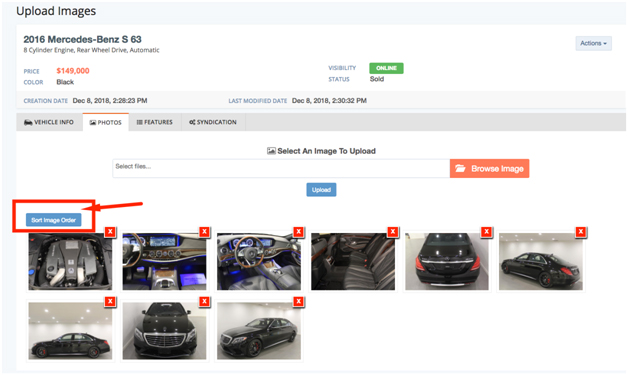
f. Selecting the X on the top right corner of the photo will remove/delete the image.
STEP 3 OF 4: Features
Features
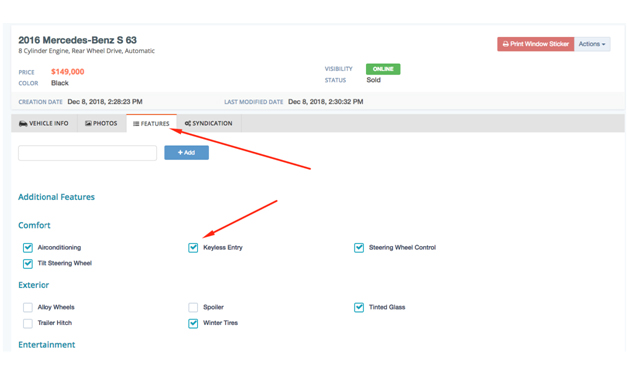
1. A selection of features is available to choose from. Place a checkmark in all those features that apply to this vehicle.
2. These selected features will show on the Vehicle details page.
3. If a feature you would like to add is not on the list, you can type it in text the box and click the blue +Add button. It will be added under the Additional Features heading. You also have the ability to override the features by using the decoder. This only works if the VIN is entered into the system for that specific vehicle.
STEP 4 OF 4: Syndication
Syndication
1. Syndication allows integration with a third party so that the inventory details are sent to that third party to display. It allows inventory management from one centralized source (your website) while allowing you the ability to display on multiple platforms (i.e. Kijiji, Car Gurus, Autotrader, etc.).
2. Syndication options are dependent on the package purchased. The only checkbox items you will see are those your website is enabled for.
3. Select the checkbox if you wish to have this vehicle included in the syndication feed.
4. After all updates have been made, select Save.
5. Refresh your website to see the vehicle listed.